Thursday, June 12, 2014

Best Friends and Overnight Caramel Rolls

We moved to a new neighborhood before I started elementary school and in a backyard catty corner to mine lived a girl my age that quickly became my best friend. Her name was Becca and we missed the bus on the first day of kindergarten together (it did not pick-up at our houses for afternoon kindergarten like it did in the mornings). 

Even though we moved to the other side of town in third grade we saw each other at school throughout elementary and became really close again in middle school. In fact, in high school we were voted Best Friends in the senior edition of our school newspaper. 

Here is a picture of us on the first day of Kindergarten and the last day of High School!


We both loved being goofy, loved watching movies (Kindergarten Cop and Romie and Michelle's High School Reunion being some of the favorites), and loved music (The Beatles in particular!). We did the Huntington County Children's choir together, Riverview Singers, and although I had to choose between band and choir in high school (I went with band) I joined the show choir as a stage crew member so we could spend even more time together (amongst other reasons). I became best friends with her cousin Andrea through church (didn't know they were cousins at the time) and the three of us became inseparable for a long time. We had countless sleepovers, trips to summer camp, and we even made our own singing group called AlBeAn ;0)

Andrea, Becca, and I

Although we live a few hours apart and only see each other once or twice a year it's the kind of friendship that feels like you've never been apart; you pick up right where you left off!

I got this recipe from Becca's mom a long time ago. It's so easy and I always get tons of compliments! Margi always made it in a bundt pan so you can give that a try but I find it easy to make the individual rolls for sharing (although I'm sure they don't look as pretty). Enjoy!!

Overnight Caramel Rolls


Ingredients:
12-15 Rhodes yeast rolls (dough-not baked)
1 small package Jello Cook-n-Serve (not instant) Butterscotch Pudding
1 stick of butter
1 cup of light brown sugar
Chopped nuts (optional)

Directions:
1. Spray a deep roasting pan or cake pan (9x13ish - I usually buy the foil roasting pans) with cooking spray
2. Sprinkle nuts in the bottom of the pan (optional)
3. Place frozen rolls in the pan.
4. Sprinkle dry pudding mix over rolls.
5. Melt butter and brown sugar in a small saucepan over medium heat until melted together and bubbly.
6. Pour over the frozen rolls.
7. Partially cover with foil or plastic lid and allow to rise overnight. 
8. Bake at 375 for about 10-15 minutes or until tops are brown.
9. Let cool slightly; invert onto a serving dish and serve!


Sunday, March 23, 2014

More on Birthdays and Fried Ice Cream

Growing up we always had that place. You know, the one that you pick every year for your birthday. For my mom and I we usually picked Red Lobster. Yum! The crab legs and cheddar bay biscuits were on my list of have to haves. They also gave you a chocolate cake when it was your birthday and yes; they sang!

My sister Rosie always picked Chi-Chi's. Man, I miss that place! Delicious Mexican and Rosie and I always played the Pac Man game in the lobby while we waited to be seated. Although I appreciate Mexican food way more now than I used to (pretty sure I could have it at least twice a week and not get tired of it) there has always been one thing there that I loved from the very first bite: fried ice cream. The only fried ice cream I have had that was just as good was from the Asian Restaurant Spice (Asian? Weird, I know!) at the Excellence Resort in Cancun and Punta Cana but it was actually fried in batter.

For Gwen's second birthday we threw her a Dora Fiesta. While trolling through Pinterest looking for ideas, I came upon a recipe for fried ice cream (original post here). Not only is it amazingly delicious but there are only 6 ingredients and it is super easy! You make it ahead of time so it's great to be able to just pull it out of the freezer and serve.

Happy, Happy, Happy Birthday
To you, To you, To you, OLE!


Fried Ice Cream Dessert
(Sorry for the blurry picture)


Ingredients:
1 stick butter
1 cup of sugar
3 cups of crushed corn flakes
2 qts. of vanilla ice cream (softened)
1 container of whipped topping
1 t. cinnamon
Honey, for drizzling

Here's what you do:
1. Melt butter in frying pan
2. Add corn flakes and sugar. Fry for about 3 minutes, stirring constantly so the sugar doesn't burn.
3. Pat about 1/2 - 2/3 of this mixture into a 9x13 pan.
4. I let the ice cream sit out for about 1/2 hour to soften it. In a LARGE bowl, beat together (I used my mixer) the ice cream, whipped topping, and cinnamon.
5. Pour ice cream mixture on top of crust in the 9x13 pan.
6. Sprinkle the rest of the crumbs on top and freeze.
7.   Lightly drizzle each serving with honey. 

Enjoy!

Sunday, February 23, 2014

Thoughts on the Paula Deen Scandal and Gold Medal Fajitas

*Note: I wrote this last summer when this scandal first started and apparently never got around to posting it. It sounds like Paula will be coming back to TV soon although still not for Food Network which is a shame; her food is amazing!*

 I have to admit I do not know much about the lawsuit Paula Deen is involved in so I am stating my opinion based solely on her use of inappropriate language. Do I like the fact that she used the N-word to describe someone; No! I do however think it has been blown way out of proportion. Would I feel differently if it had been derogatory against me? Maybe, I can't say. This is what I do know...I remember visiting my grandparents in Florida one summer when I was in high school. I don't remember the topic of conversation but somewhere in the conversation my grandfather used the N-word too. I was shocked to say the least and a little disappointed. Then I had to remember that my grandfather was born and raised in South Carolina.  He lived during a time when that word was used very commonly. It didn't make it right but it did help me understand. Paula grew up in that same situation. 

I also try very hard not to judge others keeping in mind John 8:7 (NLT): 
They kept demanding an answer, so he stood up again and said, "All right, but let the one who has never sinned throw the first stone!" I know I am not in the public spotlight like Paula is but I am not perfect either. 

She has apologized and tried to make things right, she can't go back and change what she said. Is it right to destroy her entire life over this? It makes me a little disappointed in her but I still think she is an amazing chef and I love her recipes. I therefore am not boycotting Paula Deen and am sharing another one of our favorite recipes of hers with you tonight.

Paula Deen's Gold Medal Fajitas


Ingredients
1/4 cup vegetable oil, divided
3 tablespoons lemon juice
1 garlic clove, minced
1 teaspoon ground cumin
1 teaspoon garlic powder
1 teaspoon onion powder
Dash hot sauce
Salt
Freshly ground black pepper
1 1/2 pounds meat (boneless, skinless chicken breast, skirt steak or peeled and deveined shrimp)
1 medium onion, halved and sliced lengthwise
1 green bell pepper, sliced
1 red bell pepper, sliced
8 (8-inch) flour tortillas
1 lime, juiced, for topping
Sour cream, for topping
Salsa, for topping
Guacamole, for topping
Cheddar cheese, shredded, for topping

Directions
In a heavy duty resealable plastic bag, combine 2 tablespoons of the vegetable oil, lemon juice, garlic, cumin, garlic powder, onion powder, hot sauce, salt, pepper and your choice of meat. Seal and toss the bag around to coat. Marinate in the refrigerator. *Cook's Note: 15 minutes for shrimp, 20 minutes for chicken and 1 hour for skirt steak.

Preheat your cast iron servers in a preheated 400 degree F oven for at least 20 minutes, to get a good sizzle when you plate the fajitas.

Heat the outside grill or a large indoor grill pan to medium-high heat. Remove the meat from the marinade and place it on the hot grill, discard the marinade. Cook chicken until cooked through, about 5 minutes per side, skirt steak about 3 minutes per side for medium-rare and about 2 minutes for shrimp. Slice the chicken and steak into strips if you are using.

In a large skillet heat up the remaining 2 tablespoons vegetable oil and fry the onions and bell peppers until crisp-tender with some salt and pepper.

Wrap the tortillas in foil and warm them in the oven with the servers for 15 minutes.

When you are ready to serve, remove the cast iron servers from the oven and quickly arrange the meat and peppers and onions on it. It will immediately start to sizzle from their fat and moisture. Serve sizzling immediately with the warm tortillas and other accompaniments.


Enjoy!

Back Again 2.0 and Turkey Shepherds Pie

I apologize for the long hiatus. Life got in the way! A repost about 2 weeks ago got me in the mood again and so here I am! I have so many yummy recipes to share with all of you and I hope you'll do the same in return. Every few months I definitely get in a meal rut so it's nice to have some new ideas.

This recipe comes from another of my favorite TV chefs: Rachel Ray. Andrew has a good friend from high school that I swear has her voice, personality, and looks a lot like her too! Rachel has a lot of tasty ideas although she does cook a lot of pastas so if you are a carb watcher a lot of her stuff may not be for you. She also has a really cool garbage bowl (a bowl where you put all of your scraps and trash) that I would eventaully love to have for my kitchen (although I'm sure I could use just any large bowl; I just always forget!). This yummy dish doesn't use any pasta but some delicious mashed potatoes do grace the top! Even my pickiest eater ate 2 big bites without complaining (although she still asked for some chicken nuggets...sigh). This is also one of her many "Yum-o!" recipes which means it's good and good for you. To find out more about Yum-o!, Rachael's nonprofit organization, go to www.yum-o.org.


  • Ground Turkey Shepherd's Pie
  • Serves 4


Ingredients:
  • 4 large Idaho or Russet potatoes, peeled and cut into chunks (2 1/2-3 pounds)
  • Salt
  • 2 tablespoons extra virgin olive oil (EVOO)
  • 2 slices bacon, chopped or snipped with kitchen scissors
  • 2 pounds ground turkey or ground turkey breast
  • 2 onions, chopped
  • 2 carrots, peeled and chopped
  • Pepper
  • 2 tablespoons Worcestershire sauce (eyeball it)
  • 2 teaspoons poultry seasoning
  • 1 cup frozen peas
  • 2/3 cup half-and-half or cream, divided
  • 1 egg, beaten
  • 2 tablespoons butter
  • 2 tablespoons chives, snipped or chopped
  • 1 teaspoon paprika
Directions:
Place the potatoes in a small, deep pot. Cover with water, set the lid in place and set the pot on stove. Turn the heat on high and bring potatoes to a boil. Salt the water and cook potatoes until tender, 12-15 minutes.
While the potatoes cook, place a deep skillet on the stovetop over medium-high to high heat and add 2 tablespoons of EVOO, two turns of the pan. When the EVOO is hot, add the bacon and cook until crisp, 5 minutes, then add the turkey and break it up with a wooden spoon. Season the turkey with salt and pepper and brown it for 5 minutes, then squish it off to the sides of the pan and add the onions and carrots to the center of the pan. Season the veggies with salt and pepper and let them cook in the center of the pan, where it is hottest, for 5 minutes, then mix everything together.
Add the Worcestershire sauce and poultry seasoning to the turkey, then turn the heat down to medium and cover the pan with a foil tent to keep in some of the moisture. Cook another 6-7 minutes.
Pre-heat the broiler to high.
Drain the potatoes and place them back in the warm pot. Use a pot holder to hang on to the pot while you smash them up. Add 1/3 cup half-and-half, salt, pepper, egg, butter and chives and smash away with a masher until potatoes are almost smooth, but are still a little lumpy.
Remove the foil from the turkey pan and stir in the peas and the remaining 1/3 cup half-and-half. Scrape up any good bits from the bottom of the pan and turn off the heat.
Scrape the turkey into a small casserole dish, top with a thick layer of smashed potatoes, then transfer to the broiler. Cook until top is brown, then sprinkle with paprika and serve.

Enjoy!

Saturday, January 26, 2013

Birthdays and Hawaiian Ham and Cheese Sliders


Birthdays are a super special event in our house or at least we try to make sure they are :0). While working on the plan for this year's upcoming birthdays of our soon to be 4 and 2 year olds, I am reminded of last year's parties. The almost 3 year old (at the time) was finally able to have an opinion about her party theme and chose a monster party which turned out to be a blast! And since our littlest was too young to decide for herself, we chose a luau theme which was perfect for her late June birthday. The hit of the luau were these incredibly delicious ham and cheese sliders on Hawaiian rolls! I had first discovered them at our niece's birthday and they were so good I knew they would make the perfect addition to our luau. I'm pretty sure I could eat an entire pan of these myself so beware ;0).

Hawaiian Ham and Cheese Sliders


1- 12 pack King's Original Hawaiian Sweet Dinner Rolls
1 lb. Deli Ham
1 lb. Swiss cheese (thinly sliced)
1 stick of butter
1 Tbsp. Dijon Mustard
1 Tbsp. Worcestershire Sauce
1 1/2 tsp dried minced onion
Poppy seeds

You can leave rolls intact but slice through the middle. Layer with cheese, ham, and more cheese. Top with roll tops. Place rolls in a 9x13 pan. Mix butter, mustard, Worcestershire sauce, and onion in a small saucepan until butter is melted. Pour over tops of rolls. Sprinkle with poppy seeds. You can refrigerate a few hours, overnight, or not at all (I usually go for not at all as I want them now but for the party I did them before hand and refrigerated them until I was ready). Bake at 350 degrees for 20 minutes or until tops are golden brown and cheese is melted (if tops are browning too quickly, cover with aluminum foil until cheese is melted). Serve warm.

Be on the lookout for more on this year's parties: a Superhero party for our eldest Super Girl and either an owl or Elmo party for the youngest :0) I've included a few pictures below of our monster party and luau for fun. Enjoy the sliders!

The birthday girl waiting so patiently!
Party favor bags for the guests
Funny face but a good one of her monster outfit; thanks Grandma Grace!
Birthday banner
Dessert!!

The birthday girl posing for her invites
The dessert table is prepared
Teddy bears in inner tubes
Teddies on the beach
Umbrella wreath
Birthday banner...love my cricut!
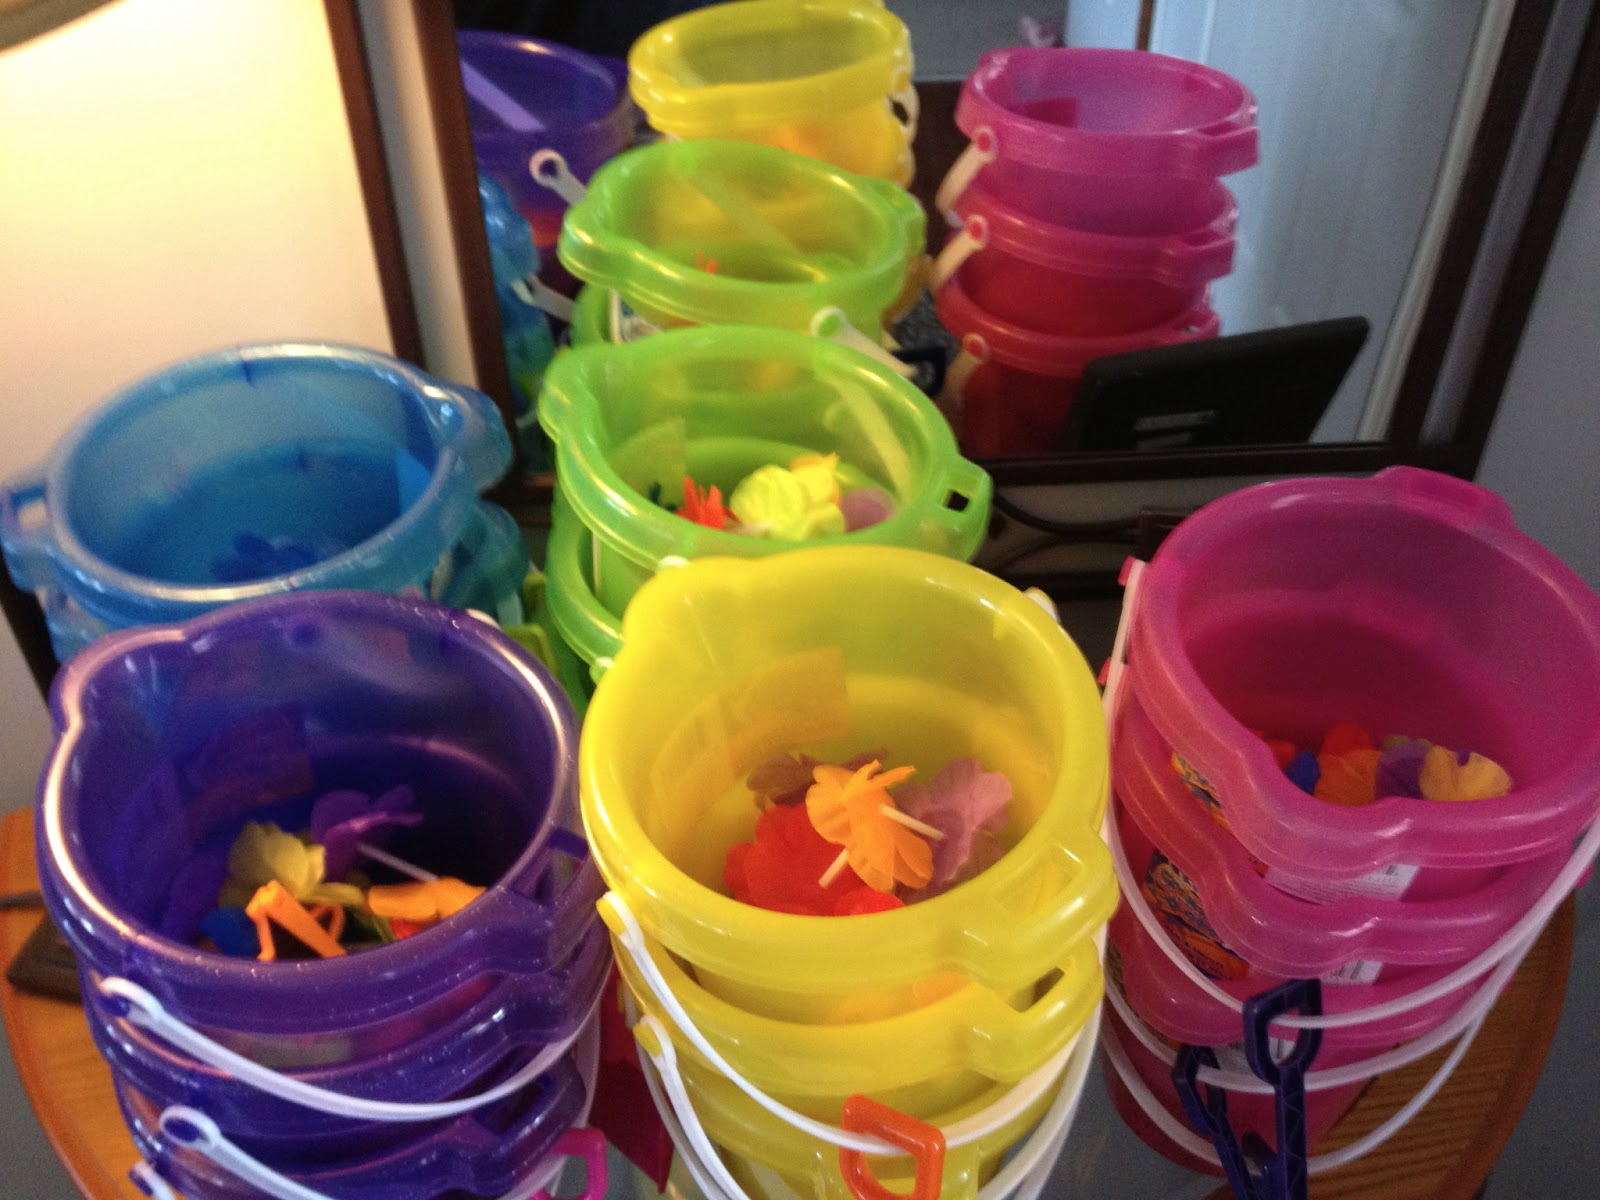
Party favor buckets
Fruit platter
Birthday girl in her Hawaiian dress


Sunday, January 6, 2013

Back Again and Buttermilk Brined Turkey Breast

Welcome back! I know it's been awhile. My laptop died and typing on an iPad is not the easiest thing to do so I was lazy and gave up. For Christmas, I got a bluetooth keyboard case for my iPad so I am back in business with lots of recipes to share! 
     One of my favorite foods is BBQ. We have a few sit down BBQ restaurants up here in the north but BBQ is generally expensive and paying a tip on top of that deterred us most of the time. I had just commented to my husband that they should have a BBQ fast food restaurant of sorts when we noticed a sign on a restaurant being built. It read City BBQ and wouldn't you know, it is exactly the type of restaurant I was talking about! 
     For the last two years, we have frequented City BBQ a lot of times. In fact, while I was pregnant with G, we ate there at least once a week and that was my first meal after her delivery. About a year and a half ago maybe, my brother in law got a smoker and smoked pork for my nephew's birthday party and a turkey at Thanksgiving...the flavors were amazing! I began wishing for our own smoker. My wishes were granted this year for my 30th birthday when my husband bought me a little charcoal smoker. The pork was delicious but it took a really long time as it was hard to keep the smoker up to temp. We decided to go ahead and upgrade to a propane smoker and I'm so glad we did! We've now smoked a few pork butts, a chicken, and a couple turkeys. We still enjoy going to City BBQ for delicious food but we also enjoy making our own at home as well. I saw a picture of a buttermilk brined turkey on Pinterest (I told you I was addicted) but after discovering the brine to be a mix you were supposed to buy from Williams and Sonoma, I ran to my next recipe source: The Food Network. Hooray! I discovered a buttermilk brine created by Guy Fieri. You can check out the original page here
     Fieri's recipe has you baking the turkey but if you have a smoker I highly recommend it! We used a mixture of cherry, apple, and hickory chips. The fresh turkey breast I bought at Target was a little over 6 pounds so I doubled the brine.


Buttermilk Brined Turkey Breast


Ingredients
  • 1 (2 1/2 to 3-pound) turkey breast, bone-in
  • 3 cups buttermilk
  • 1/2 cup hot sauce (recommended: Crystal; I used Frank's)
  • 2 tablespoons kosher salt
  • 1 tablespoon dried basil
  • 1 tablespoon granulated garlic
  • 1 tablespoon fresh cracked black pepper
  • 1 teaspoon cayenne pepper
  • 1 teaspoon ground white pepper
Directions
Combine all the ingredients together in a large resealable plastic bag (or box in my case). Place in a bowl, to catch any leaks, and refrigerate for 12 to 24 hours. Take out, pat dry and smoke (see link above for oven directions).

Prep work is done!


Turkey is swimming in the buttermilk brine.

Into the fridge we go...goodnight!

Turkey is out and warming up slightly before going into the smoker.

Love our smoker! We are able to cook several things at once which comes in handy sometimes. 

About 3 1/2 hours later we reached the magic temp for turkey
Beautiful golden brown!
Nice and juicy... and look... a nice pink smoke ring!
Dinner was delicous and there's plenty of leftovers for sandwiches!

I'll try to get back to my weekly posts; enjoy! 

Sunday, July 8, 2012

A little about my sister-in-law and CAKE!

Okay, so I love my husband's family dearly! I hang out with them even when my hubby is not around which I think says a lot :0) My hubby has just one sister and we have a lot of interests in common. One thing my sister-in-law loves to do is throw parties (in particular her children's birthday parties) and she sets the bar pretty high. Each party is centered around a theme including food and even an adult beverage. It's so much fun and she always shares ideas which is nice. I don't even remember what kind of party it was where she first introduced us to this absolutely marvelous creation...The Chocolate Lover's Dream Cake. I'm not 100% sure on the origin of this cake, I just know she got it out of a cook book that doctors up store bought cake mixes. Be sure to try this one...you won't regret it!  


Chocolate Lover's Dream Cake 


Cake:
1 box Betty Crocker Butter Recipe Chocolate Cake Mix
1/3 cup butter
3 eggs
1/2 cup chocolate milk 
1 small box instant chocolate fudge pudding (dry)
1 16oz container sour cream 
1 bag chocolate chips (I use milk choc., original recipe calls for semi sweet) 


Glaze: 
1 1/2 teaspoons water 
3/4 cup chocolate chips (milk or semi sweet) 
3 Tablespoons butter
3 Tablespoons light corn syrup 


Mix all cake ingredients together. It will be extremely thick! Spoon into a greased and floured 12-cup (make sure it's 12 cups!) bundt pan. Bake at 350 degrees for 55-65 minutes. Let cool for 10 minutes, then turn out on a cookie sheet to cool. When the cake is cooled, make and top with glaze. Store at room temp loosely covered or in fridge. 


I can't just leave you with one cake so I am going to share another doctored up cake mix for you that I discovered from a very talented coworker of mine. You can check out her blog post and others by visiting Basilmomma. This recipe originally comes from one of my favorite ladies...Mrs. Paula Deen. I've made these a few times now and I'm pretty sure I could eat the entire cake in one sitting! I turned this into cupcakes for birthday parties and it works beautifully (the icing even works fairly well being piped onto the cupcakes). 


 Pink Lemonade Cake 
Adapted from a Paula Deen recipe 


Cake: 
1 box of Duncan Hines white cake mix 
1 tsp lemon zest (I used 2 tsp) 
2 tsp pure vanilla extract 
3 TB of Country Time Pink Lemonade Powdered drink mix 


Frosting: 
1 cup (2 sticks) of unsalted butter, softened (I used 1 stick, your preference)
1 pound of confectioners sugar 
5 TB frozen pink lemonade concentrate (use just a bit more if it is thick, to taste) 
1 tsp pure vanilla 
1 tsp lemon zest (I used 2 tsp) 


Preheat oven to 350 degrees and prepare cupcake pans (Basilmomma used 2 - 8 inch round cake pans). Prepare the cake batter according to the box directions using the ingredients listed.  To the batter add the lemon zest, vanilla and pink lemonade powder.  Stir to combine.  Pour the batter evenly to the pans.  Bake until golden and a toothpick inserted into the center comes out clean, about 20 minutes.  Remove the cakes and allow to cool in the pans for 10 minutes.  Then carefully turn out onto a wire rack to completely cool. While the cupcakes are baking, prepare the frosting by beating together the confectioners sugar and the softened butter until fluffy.  Beat in the remaining frosting ingredients until combined. Ice your cake/cupcakes. 


My youngest angel just celebrated her first birthday with a luau and my next blog post will feature these amazingly yummy ham and swiss sandwiches. Until then, here is a picture of my girls in their tutus from my last posting...enjoy!